Find the secret to achieving your dream hair with I-Tip extensions. These revolutionary extensions offer a natural look and feel. Say goodbye to thin or lackluster hair and hello to voluminous locks. Learn more about the wonders of I-Tip extensions and unleash your hair’s full potential.
Are you tired of battling with thin or flat hair? Say goodbye to hairstyle struggles and hello to confidence with I-Tip extensions. Transform your look and embrace the hairstyles you have always dreamed of effortlessly.
What are I-Tip Extensions?
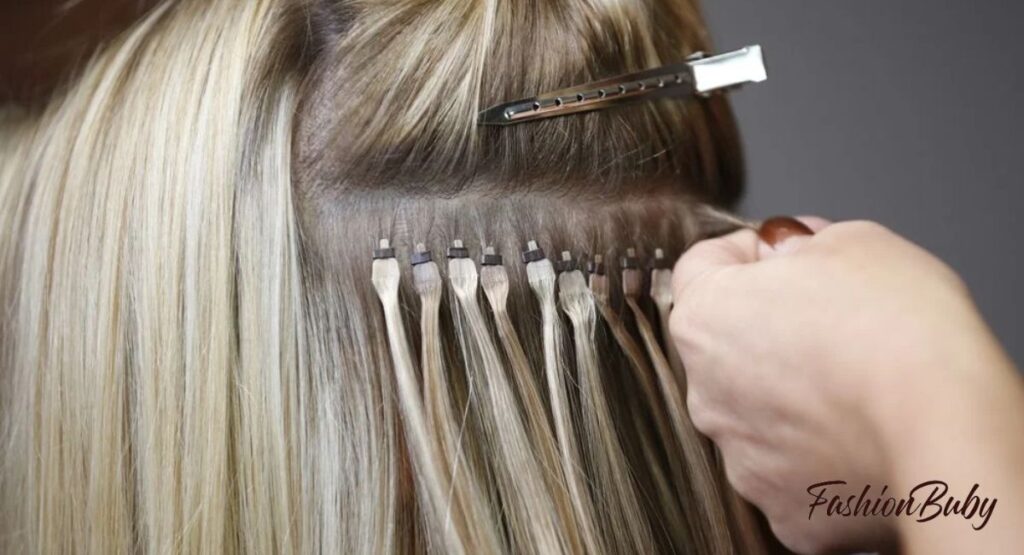
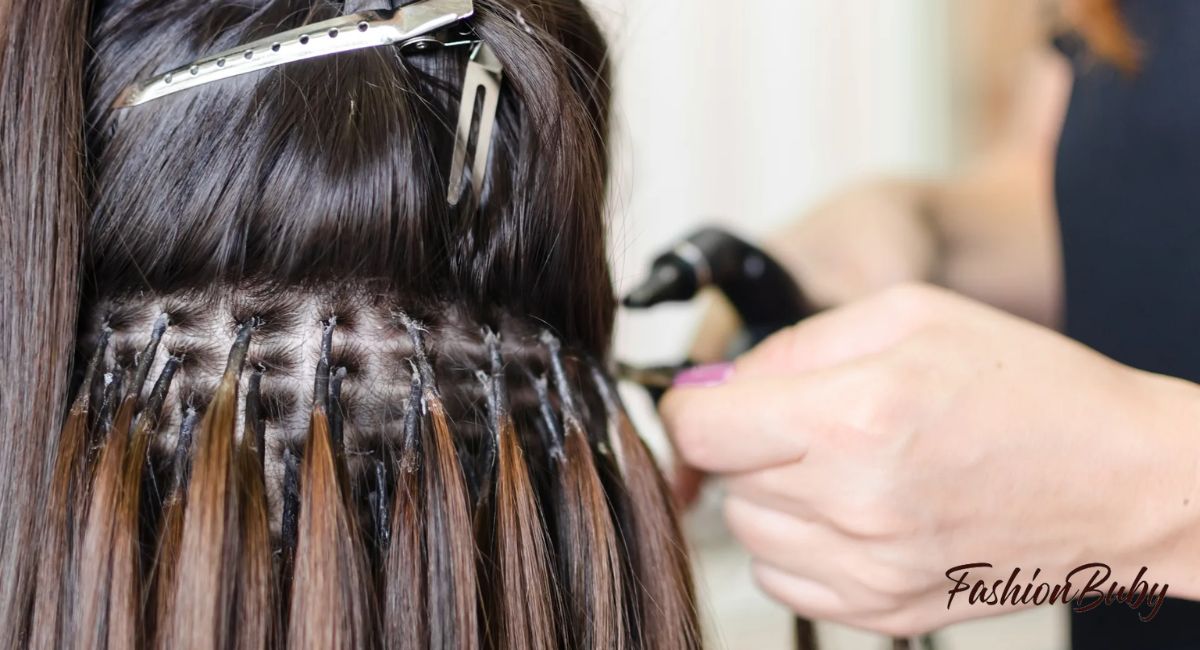
I-Tip extensions are small bundles of hair attached to a tiny bead. A professional stylist secures these beads to your natural hair using a special tool. Once attached, they blend seamlessly with your hair for a natural look.
These extensions come in various lengths, colors, and textures. They’re perfect for adding length, volume, or highlights to your hair. With proper care, I-Tip extensions can last for several months, giving you long-lasting beautiful hair.
Related Post: How To Massage Scalp After Hair Transplant
Other names for I Tip Extensions?
Microbead Extensions
- Tiny beads secure individual hairs strands to your natural hair.
Micro Link Extensions
- It’s similar to Microbeads, hair strands are attached using small links or beads.
Micro Ring Extensions
- Hair extensions are secured using small rings or loops, offering a discreet attachment method.
Step by Step: How to put in I Tip Hair Extensions?
To put in I-Tip extensions, start by sectioning your hair.
What you need
To apply I-Tip extensions, you’ll need the extensions themselves, a threading tool, beads or rings, and pliers. The threading tool helps to pull a section of your natural hair through the bead or ring. Pliers are used to secure the bead or ring in place, ensuring a firm attachment. With these tools and extensions, you’re ready to achieve your desired look.
What you do
First, section your hair and use a threading tool to pull a strand through a bead or ring. Then, slide an I-Tip extension into the bead or ring and clamp it shut with pliers. Repeat this process for each extension, ensuring they are evenly distributed for a natural look.
How long do they last?
I-Tip extensions typically last between 2 and 6 months. The duration depends on various factors, such as how well they are maintained, the quality of the extensions, and how fast your natural hair grows.
With proper care and maintenance, you can extend the lifespan of your I-Tip extensions. Regular brushing, using a sulfate-free shampoo, and avoiding excessive heat styling can help preserve their quality and longevity. Additionally, scheduling touch-up appointments with a professional stylist can ensure that the extensions remain secure and blend seamlessly with your natural hair.
I-Tip extensions damage your hair?
When properly applied and maintained, I-Tip extensions should not damage your hair. However, improper installation or neglecting proper care can lead to damage over time. It’s essential to have extensions installed by a professional stylist who is experienced in the technique to minimize the risk of damage.
Avoiding excessive tension on the roots and following recommended maintenance guidelines can help protect your hair from any potential damage.
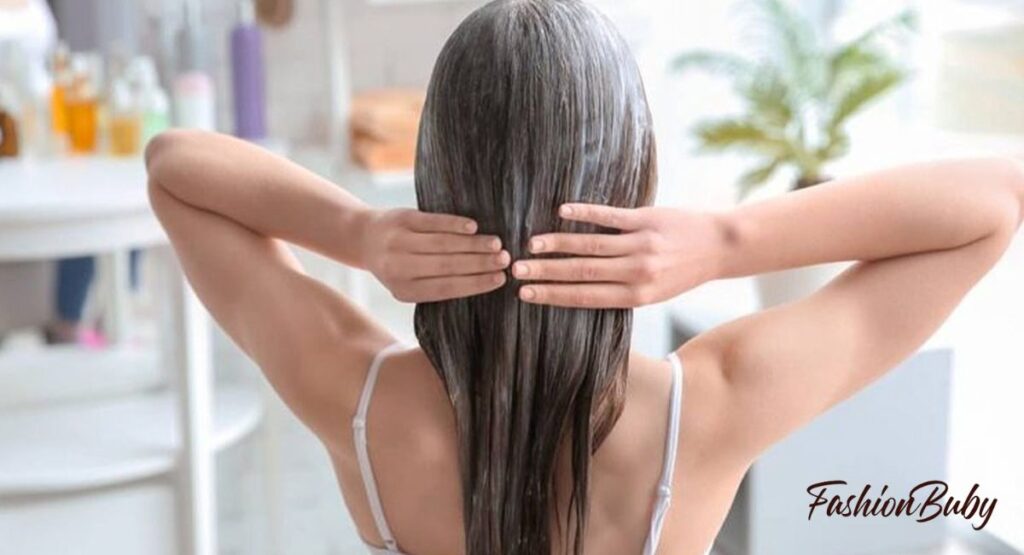
How to care for your I-Tip extensions
Caring for your I-Tip extensions is essential to maintain their quality and prolong their lifespan. Here are some tips:
- Brushing: Use a special loop brush or a wide-tooth comb to detangle your extensions gently. Start from the ends and work in your way up to the roots to avoid pulling on the bonds.
- Washing: Wash your extensions with a sulfate-free shampoo and conditioner. Avoid rubbing or twisting the extensions and instead gently massage the products into the hair.
- Drying: Allow your extensions to air dry whenever possible. If using heat styling tools, use a low heat setting and apply a heat protectant spray to prevent damage.
- Sleeping: Before bed, braid your hair or tie it in a loose ponytail to prevent tangling while you sleep.
- Styling: Limit the use of heat styling tools and avoid pulling or twisting your extensions excessively. Opt for hairstyles that put minimal stress on the bonds.
- Maintenance: Schedule regular touch-up appointments with your stylist to ensure the extensions remain secure and well-maintained.
I-Tips Hair Extensions Before and After
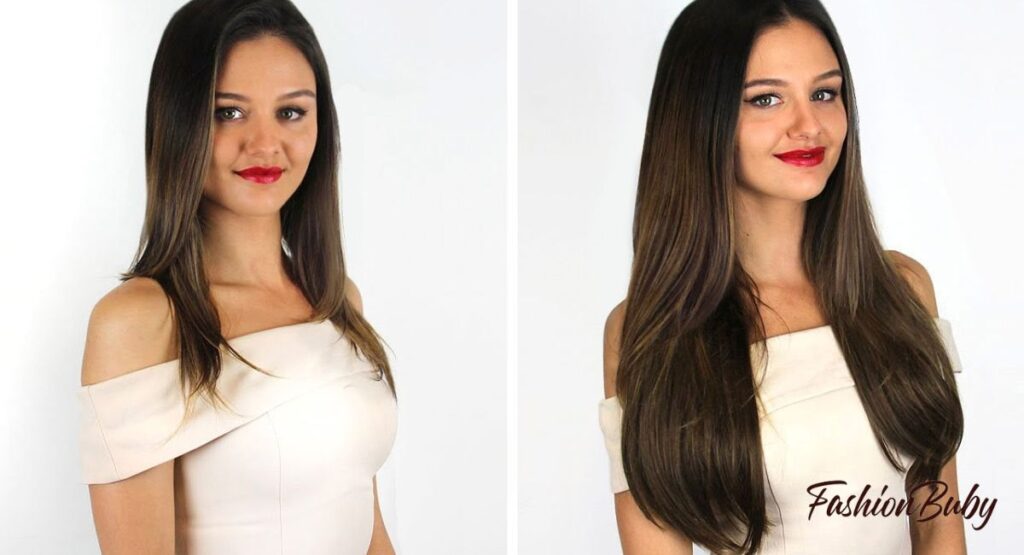
Before getting I-Tip extensions, your natural hair may be thin, lack volume, or have a shorter length. You might feel dissatisfied with your current hairstyle and desire a change.
After getting I-Tip extensions installed, you’ll notice immediate changes. Your hair will appear longer, fuller, and more voluminous. You’ll likely experience a boost in confidence with your new, enhanced hairstyle.
How much do I-Tip Extensions Cost?
The cost of I-Tip extensions can vary depending on factors such as the length, quality, and quantity of the extensions. On average, you can expect to pay anywhere from $100 to $500 for a full set of I-Tip extensions.
Higher-quality extensions made from human hair typically come with a higher price tag, while synthetic options are more budget-friendly. Additionally, the cost may include installation fees if you choose to have them applied by a professional stylist.
Frequently Asked Questions
How long do I-tip extensions last?
I-Tip extensions typically last between 2 and 6 months, depending on maintenance and hair growth. Proper care can help extend their lifespan.
Are I-tip extensions damaging?
When properly applied and maintained, I-Tip extensions should not damage your hair. However, improper installation or neglecting care can lead to damage over time.
What’s the difference between K and I-tip extensions?
K-tip extensions use keratin bonds that are fused to the hair with heat, while I-tip extensions use small beads or rings to attach the hair without heat. K-tips offer a more permanent solution, whereas I-tips are easier to adjust and remove.
What is the difference between U-tip and I-tip extensions?
U-tip extensions use keratin-based tips that are fused to the hair with heat, while I-tip extensions use small beads or rings for attachment without heat. U-tips offer a more permanent bond, whereas I-tips are easier to adjust and remove.
Can I shower with i-tip extensions?
Yes, you can shower with I-tip extensions, but use a sulfate-free shampoo and conditioner. Avoid tugging or rubbing the extensions to maintain their integrity.
Can you wear your hair up with Itip extensions?
Yes, you can wear your hair up with I-tip extensions. Ensure the extensions are placed strategically to remain discreet and comfortable in various hairstyles.
Conclusion
I-Tip extensions offer a revolutionary solution for those seeking to transform their hair with added length, volume, and texture. When applied correctly by a professional stylist, these extensions provide a natural look and feel, blending seamlessly with your natural hair. I-Tip extensions cater to individual preferences and styles with various options in lengths, colors, and textures. Proper care and maintenance are crucial to ensuring their longevity, with regular brushing, gentle washing, and minimal use of heat styling tools.
While I-Tip extensions can be a bit of an investment, their ability to enhance your overall appearance and boost confidence makes them worth considering. By following recommended care guidelines and scheduling regular touch-up appointments, you can enjoy the full benefits of I-Tip extensions for months. Embrace the opportunity to achieve the hair you’ve always dreamed of and experience the transformative power of I-Tip extensions.